|


| So you are thinking about building an Arcade machine?
Our
intention in this section is to cover our build processes / approaches / tips & tricks etc
..and
if you are looking to purchase or commssion a complete cab off us, you
can see what you are getting / effort and quality that goes into
each build.
Refer to this page for an index of words / terminology common in reference to Arcade machines
If you still aren't sure what orintation (monitor) of game play you are after then please refer to this section:
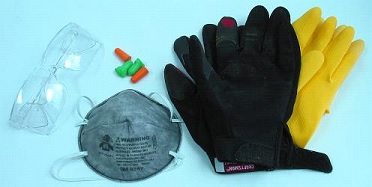
Safety First!
In
all seriousness, the time and effort saved in taking risks is not even
vaguely worth the time it takes to repair your body if it all
goes pear-shaped.
Before using any powerful tool or substance,
you should ask yourself how it can possibly affect your eyes, ears,
hands, toes, shins, lungs, skin, and perhaps other body parts.
Use
the proper safety gear for various devices and materials. Safety
glasses or goggles and sometimes gloves should be used with power tools
and hazardous chemicals. Ear plugs or muffs should be used with loud
objects like routers, jigsaws, tablesaw and sanders.
Masks,
respirators and dust collectors (like attached vacuums on some power
tools) should be used with dusty cutting (like MDF) and sprays.
Everything should be covered when using something generally hazardous
like paint lacquer. ...and avoid loose clothing and stray long hair.
Rehearse and relax, do not allow the noise or vibration to fluster you, and never rush what does not need to be rushed.
Make
sure power tools are unplugged when modifying them (like changing
blades or bits). If your hands are feeding and moving towards a blade,
something should stop your hands from hitting it if you slip; feed
things with accessories like a push stick if your safety will be
compromised.
Make sure tools are sharp and clean; dull blades
can cause dangerously unexpected effects. Be aware of kickback; tools
like routers and especially the table saw can throw objects back due to
dull blades, improper feeding, or irregularities in materials.
Also,
having an organised and comfortable workspace can help in doing
precision work and preventing injury. A work bench is good for just
this. If you do not have one, try to organise things nicely early on.
It will save time, bring better results, and make things much easier on
you. Good lighting will also be a big help.
Planning
DON'T WING IT! - seriously some of the most uglest arcades
have come about from taking a "I'll design as I go..."
process. If you take nothing else from this site, take this: You
need to plan!
Planning starts with Research
- Decide what it is you want (what game(s) you want to play)
which dictates what monitor orientation you are building re Cab
shape (horizontal or Vertical) - yes you can build a cab with a
rotating monitor and interchangable CP, but if this is your first time
(and it probably is if you are reading this) then just DON'T!
If you do, it' will probably get too hard and look ugly so you'll never complete it.
There
is no rule that states this is the only cab you'll ever own, or build -
In fact most arcade builders get the bug and build several, the
previous often being sold to pay for the next build - that's how
we got started (yes for some this does become an obsession
.. you've been warned).
Keep it simple and achievable
and you and your friends will be playing on it in no time, and you'll
have gained some new skills that can be applied to the next build (or
even just other projects).
Design the cab - either research and find a cab shape you like (and locate the plan's here) or design your own (this approach can be fraught with risks if you have never built one or restored a cab before).
Consider where it's going to live
after you have built it - what constraints are there in getting the
completed cab to its final home - I have seen many wonderful builds
thwarted by a narrow ranch slider or low ceiling above the
stairs to the 2nd floor
I bought a Sega Megalow 410 candy cab
(41" screen) a few years back, was stoked, only to find on getting it
home, there wasn't enough clearence down the side of the house to get
it to the games room - had to pay for a small crane to lift it over the
fence from the neighbours house - my "great deal" turned out to be
quite expensive and unpopular with the missus.
Plan the build
- work out the processes (before cutting anything) that you will take
to put the cab together, workout what materials (size/volume etc)
you need before going to Bunnings / Mitre10 / Hammer Hardware etc.
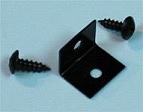
Plan the fastening approach - screws, dowels or brackets, type of glue to use etc
When
to do what - e.g. when to cut the T-molding slot (early on is easiest,
but if you have to move the work around after, you have weakend
the edges and could damage it more easily).
Plan to work
when you have hours (not minutes), you need time to consider each
step, measure twice then recheck again before cutting or modifying
anything - I know this seems common sense, but trust me, in the heat of
the project common sense becomes an oxymoron.
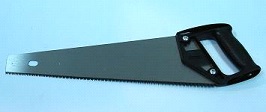
The Main Tools Required for Building the Cab:
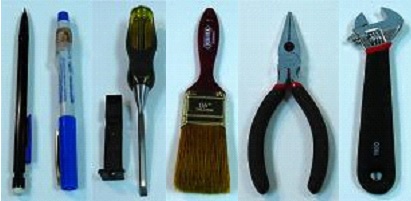 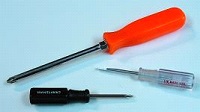 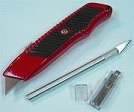 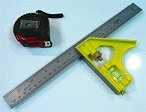
Pens,
Tape Measure, Square, Screw Drivers, Pliers, Paint Brush, Sharp
Knife, Sandpaper, Clamps and Hand Saw are the absolute
minimium
But you really need the following as well:
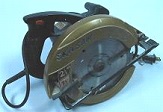 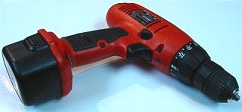 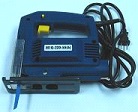 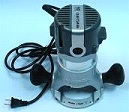
Circular Saw, Portable Driill, Jigsaw and Router.
..and to make the build easier / finished product likely look better
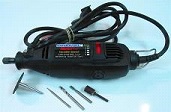 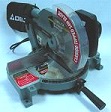 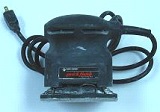
Dremel (rotary tool), Drop Saw, and Electric Sander.
Professional builders will also use a Table Saw, Router Table, Paint Booth / Spray Gun and CNC machine.
Fasteners
Loosely defined, a fastener joins objects together. Various kinds of fasteners can be used in putting various pieces together.
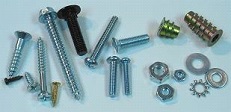
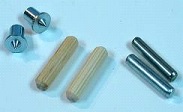
Screws and Bolts
Nails are not recommended; spiral edges on screws and bolts hold things together strongly, so use those instead.
Screws
and bolts come in two types that impact how they look on the surface of
where they are attached. Some have a non-tapered head that rests on the
surface. Others have a tapered head and are meant to sink (receased)
into the surface.
A drill bit with a countersink (or a larger bit
with shallow use) can help in installing tapered screws and bolts. Note
that non-tapered heads can be sunk too using a flat bit.
Dowels
Dowels
are solid cylinders usually made of wood, plastic, or metal used in
interlocking two pieces with snug holes drilled for each end. They and
the meeting pieces are usually all glued together. Their main advantage
is leaving no sign of their use in the final product (like a screw
hole) - reduces effort in sanding and gives a better paint finish,
but you are swapping sanding and painting effort for more effort in
planning / drilling and glueing at the front of the process , neither
approach is faster than the other.
Dowel plugs can be used to smooth and hide holes (even for screws).
Precision
is essential in using dowels. Measuring and marking placements and
making holes with a handheld drill alone will often have disappointing
results. A jig or some dowel centers and a drill with an accurate level
guide are needed for good hidden joints; a drill press does the work
even better. Use dowel joints sparingly as many of them can work
against each other in bringing things together.
 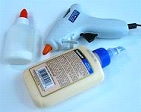
Glue
Glue will
help in permanently securing pieces together. It should cover all
portions of the areas coming together. Unless large surfaces are being
glued together, it should be used in conjunction with interlocking
produced using dowels or shaping that increases surface area.
Clamps and/or weights should be used while drying to make the bond stronger.
Take
steps to make sure different pieces fit together well before and while
gluing because, when it dries, it is generally permanent.
Excess
glue (which is usually a product of using an adequate amount of glue)
can be messy. Wiping it away with a dry cloth can rub it into the
surface and should not be done. Wiping it away with a damp cloth is
fine if the wood is not affected by water (like MDF is).
Using a
chisel or sandpaper can help get rid of it after it dries. It is often
best to use masking tape around joints before gluing to prevent much of
the problem in the first place.
Glue can make a more sleek
design than screws, but tends to be a bit more difficult in building,
and can make the things less modifiable. Note that there are different
glues designed for other materials like acrylic too.
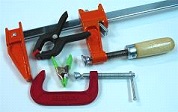
Clamps
Clamps
can be seen as a fastener as well as tools, they act as extra strong
hands that hold things in a certain position and come in a large
variety of shapes and sizes.
In addition to helping glue things
togther, they can hold many objects in place to make working them
easier, safer, and more exact. In some circumstances, a work piece can
go out of control when it is not secured using clamps. They can also
attach other objects to use as guides in working on different pieces
(ie help make jigs and fixtures).
Clamps are more useful and essential than you think, worth the investment - you will need them for you arcade project.
Use some padding like cardboard or scrap wood on clamping points to prevent unwanted indentations / marks or other damage.
Tape
A couple different forms of tape can be a huge help.
Masking
tape masks surfaces from things like glue, finish, and abrasives. It
makes cleaning glue easier. It protects areas to which you do no want
to add a finish; it can make patterns when painting. And it can protect
completed spots from sanding and sawing. Plus it can be used to make
labels.
Double-sided (double-stick) tape has adhesive on both
sides of the tape. It is great for attaching templates and assuring
things stay in desired locations.
OK, now we are ready to start a cab build:
Next Page >>> |
|
|